
Rear Quarter Cut & Custom Slider
- drewkillsit

- Feb 9, 2022
- 3 min read

I have been so anxious to finish up this rear bumper / hitch / slider project and today I finally wrapped it up. Super happy with the results! This is exactly the high clearance function and appearance I started to plan out more than a year ago. Below, I'll share a little bit about how I did it.
Cutting Procedure
I should note that I had already gone through the process of installing the custom hitch and integrated semi-custom bumper, which was something I really didn't want to do again. So, I was determined to cut the body without removing the bumper. I used a Harbor Freight Body Saw and cut a straight line from the fender flare base to the bumper.
Really important to consider that there's plenty of wiring that has to be moved and some reinforced elements that need to be cut with something much more substantial (I used an angle grinder with a cut-off wheel). Those additional cuts made this a whole afternoon endeavor.
To finish the edge, I used a 120grit flap disc and touched up the edge with matching touch-up paint. Truly looks like it came from the factory like this.

The Mount
Take a look at the mockup above (passenger side). If you look at the frame of a JT, you'll see two holes threaded for 3/8 bolts. I took a piece of 1/4" steel and drilled two corresponding holes, then attached a series of plates and reinforcements. It's easiest to see it from the side (looking from the rear of the truck toward the front; see picture below).

The black part is the frame. The piece of steel to the right is the plate indicated in the top image. To the right of that is some rectangular tubing which serves as a reinforcement. Below that, a 1/4" plate that is used to attach the "slider" piece. Lastly, there's a base piece that runs under the frame. I have a 1/2" G8 bolt running through that, and 3/8" G8 bolts on the side of the frame. Is that sufficient? No idea- I'll have to figure that out the old fashioned way.
In the 2nd image, you'll also see the slider piece (bottom right), which is attached via two 1/2" G8 bolts. The intent here is that if the bottom corner of that "slider" piece (which is a 1/4" thick rectangular tube) were to contact a rock and put pressure on the plate to which it's attached, the reinforcing tubes up top would support it.
Needless to say, there was a lot of welding involved here. While my welding skills vary between "not too great" and "maybe OK," I've found that it's a super handy ability to have, and it's changed my outlook on what I can do with this truck without having to rely on a manufacturer to figure it out for me.
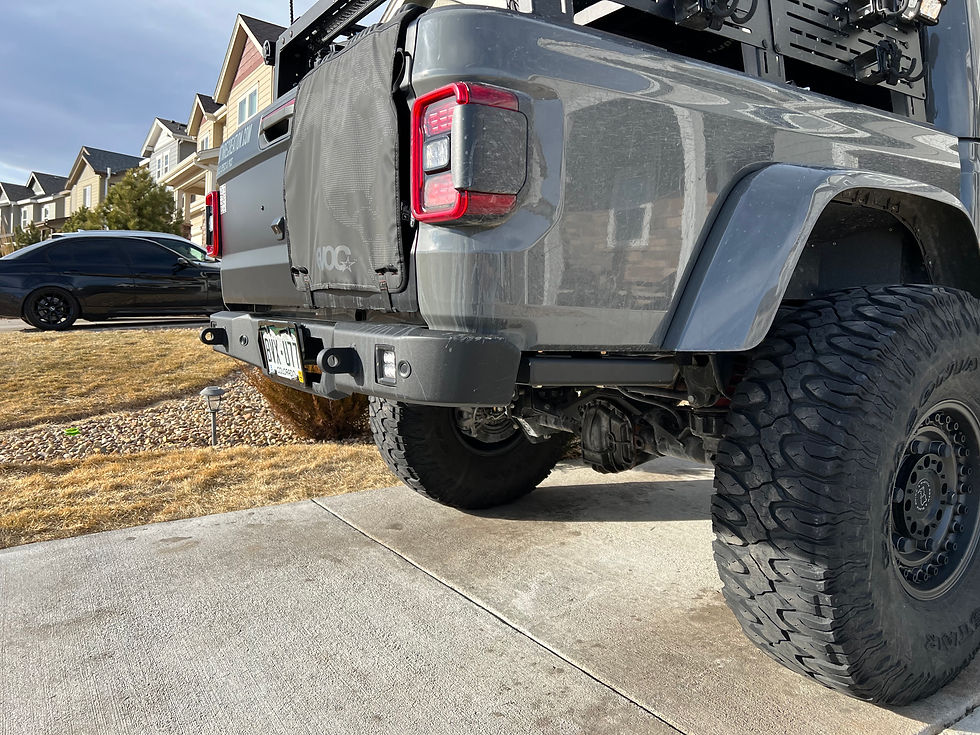
The Appearance
The 2x6 1/4" rectangular tube that I used for the slider is exactly what I wanted. I wanted to sort of "fill the gap" without trying to make the slider match up with the bumper edge (tried that initially and it looked really "chunky"). With this build, it protects the body and serves as a bridge between the depth of the bumper and the wheel well / fender flare.

Completed Rear End
The last, recent change to the bumper has been a flip-up license plate. It took forever to find the right one, but I'm very happy with this one. Remains to be seen if this thing will get caught on a rock, but I'm hopeful the new clearance and departure angle will help prevent that situation altogether.


Comments